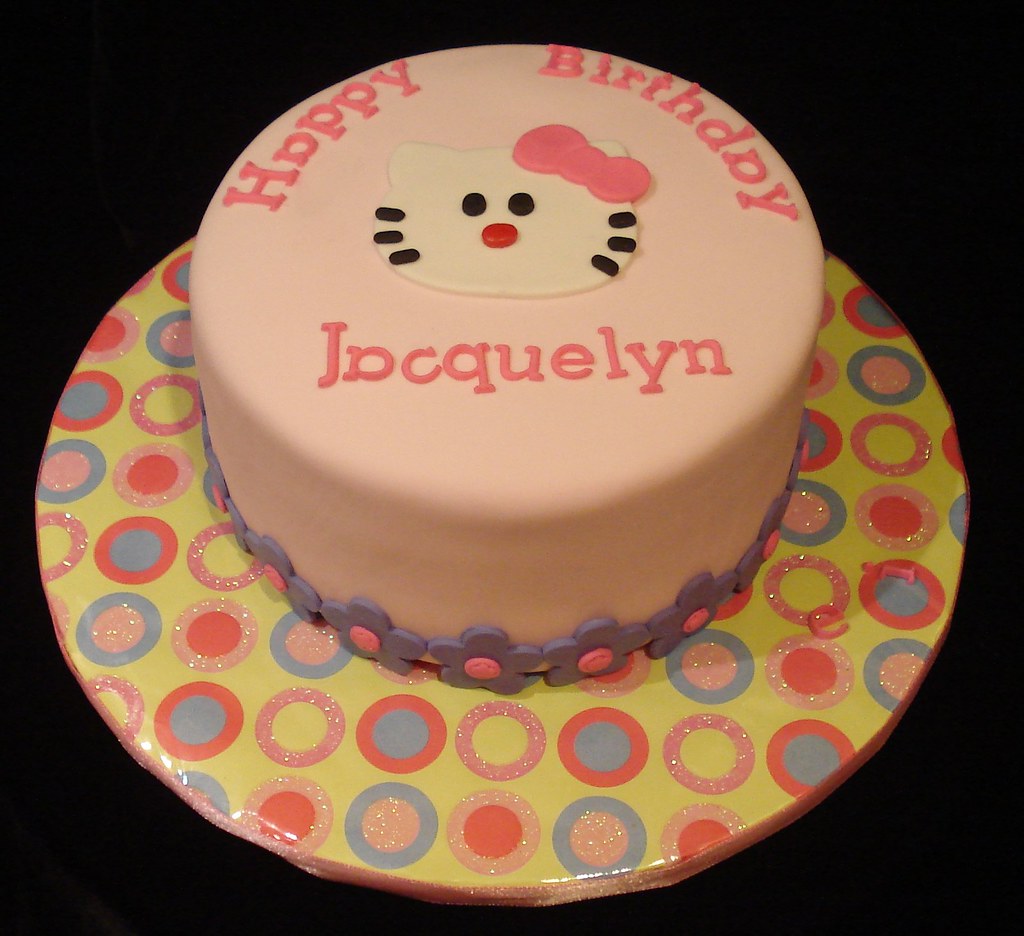
Several people have commented on my decorative cake boards. I just assumed people knew how to make decorated cake boards. But as I was looking on the web, I've discovered that there is nothing out there explaining how to make these decorative boards. I mean, they have instructions on how to COVER a cake board but not how to make them really cute or match the design/color scheme of your cake. But then again, maybe because its sooo easy and people just assume (as I did) that everyone knows how to make these decorative cake boards. So here is my attempt to explain how I was taught. I'm sure I'm telling you the cheating way and not the 'official' way but then again, that's how I was taught. I learned this when I was taking a class on how to make a purse cake.
I get my paper designs from just about any place that sells papers...from gift wrap paper (I get alot of paper from the $1 store! Ah huh, the dollar store!!!!) , to scrapbook paper (light weight)--I get a lot of this type of paper in the $1 bin at Target!! Like I said, I get paper from just about everywhere! Ideas are endless! TIP: You don't want the cake sitting directly on the giftwrap paper as it is not food safe and the oil from the cake can look very unappetizing!
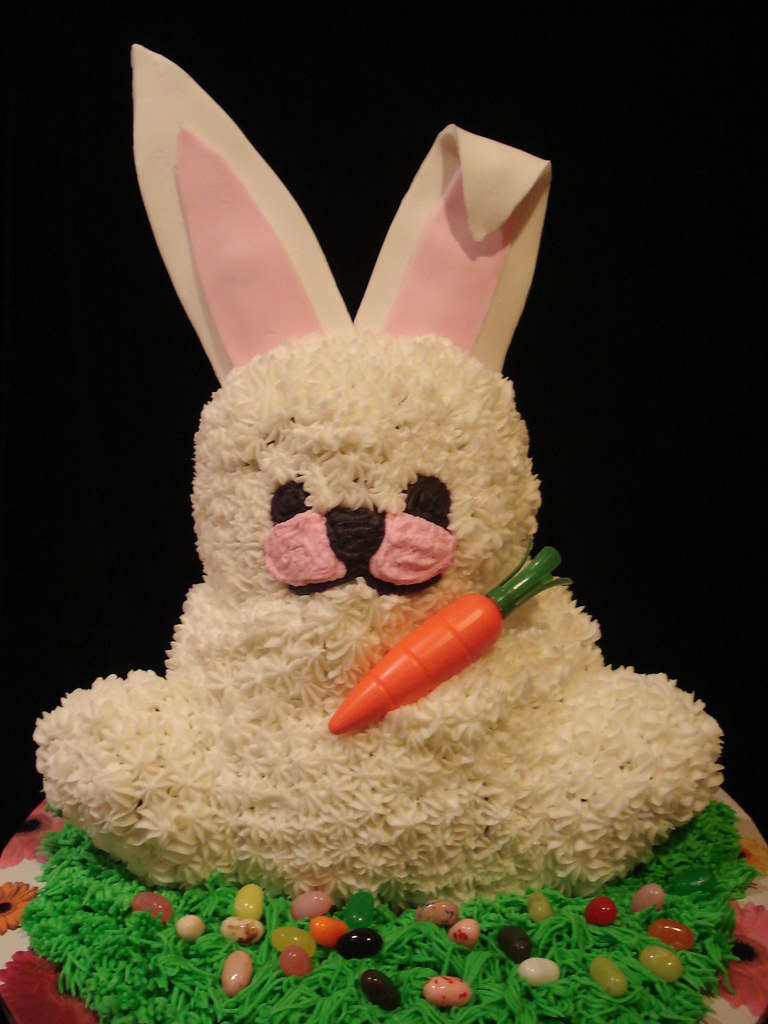
This step-by-step tutorial will show you how to make decorated cake boards. This project is perfect for any shaped cakes. There are many occasions when
cake boards are the best choice for cake
support. They are ideal for odd shapes because they can be cut to the desired shape.

You will need the following items:
- scissors
- tape
- decorative paper (aluminum foil, florist's wrap, lightweight scrap paper or giftwrap paper)
- cardboard cake board (size depends on size of cake project!)
- food safe cellophane gift wrap
- ribbon (optional)
- glue gun


STEP 1 - Choose a cake board at least two inches in diameter larger than your cake layer. This allows a minimum of one inch around the base of the cake on which to add an icing border or sugar designs.
For this tutorial, we will be using 3 cardboard circles. How did I come up with 3 cake boards to use? It depends on the width of your ribbon (if you're going to use ribbon as trimming on the board). If you're not going to use ribbon, then I would recommend you use at LEAST two cake boards for stability. I'm going to be using ribbon for trim that is the width of 3 cake boards. Kinda simple math...use as many cake boards as the width of your ribbon.
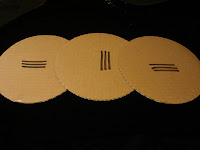

STEP 2 - To make your decorative cakeboard stable, you will need to criss-cross your cakeboards. Your cake boards have ribs in them. See black lines in pic above. Criss-cross the ribs, then secure them together with tape. I tend to just put tape on two 'sides' of the circle. Don't overdue it and don't be taunt with the tape! You're just loosely securing the cakeboards.


STEP 3 - Cut wrapping paper and cello wrap. Place them right side down on the counter-top. Cut your gift wrap and cello wrap to the size of your cakeboard, always leave at least 2inches around the width of your board. It doesn't have to be exact but make it fairly accurate.
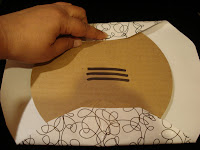

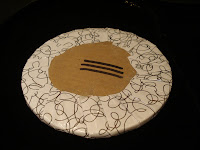
STEP 4 - Tape down papers on two 'sides' of the cakeboard. This is to keep the papers taunt while you're working on them. Fold each paper fold onto the cake board, taping it into place. Gently smooth the edge of the paper onto the cardboard as you work your way around the cake until all the pieces are taped neatly in place.


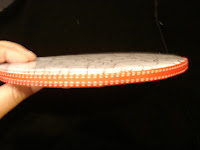
STEP 5 - Now take out your glue gun and glue the ribbon to the cakeboard. Don't use too much glue you don't want it oozing out! :D Wal-la

Cake decorators (including the professionals) use covered boards to enhance the presentation of their cakes. Whether you're making a cake for a birthday or a wedding, you can cover the board that holds the cake with foil or wrapping paper for a finished touch.

 You will need the following items:
 STEP 1 - Choose a cake board at least two inches in diameter larger than your cake layer. This allows a minimum of one inch around the base of the cake on which to add an icing border or sugar designs.
 STEP 2 - To make your decorative cakeboard stable, you will need to criss-cross your cakeboards. Your cake boards have ribs in them. See black lines in pic above. Criss-cross the ribs, then secure them together with tape. I tend to just put tape on two 'sides' of the circle. Don't overdue it and don't be taunt with the tape! You're just loosely securing the cakeboards.
 STEP 3 - Cut wrapping paper and cello wrap. Place them right side down on the counter-top. Cut your gift wrap and cello wrap to the size of your cakeboard, always leave at least 2inches around the width of your board. It doesn't have to be exact but make it fairly accurate.
 STEP 4 - Tape down papers on two 'sides' of the cakeboard. This is to keep the papers taunt while you're working on them. Fold each paper fold onto the cake board, taping it into place. Gently smooth the edge of the paper onto the cardboard as you work your way around the cake until all the pieces are taped neatly in place.

 STEP 5 - Now take out your glue gun and glue the ribbon to the cakeboard. Don't use too much glue you don't want it oozing out! :D Wal-la
 Cake decorators (including the professionals) use covered boards to enhance the presentation of their cakes. Whether you're making a cake for a birthday or a wedding, you can cover the board that holds the cake with foil or wrapping paper for a finished touch.